Sow Basil Seeds Once, Enjoy All Season: Your First Indoor Herb Project
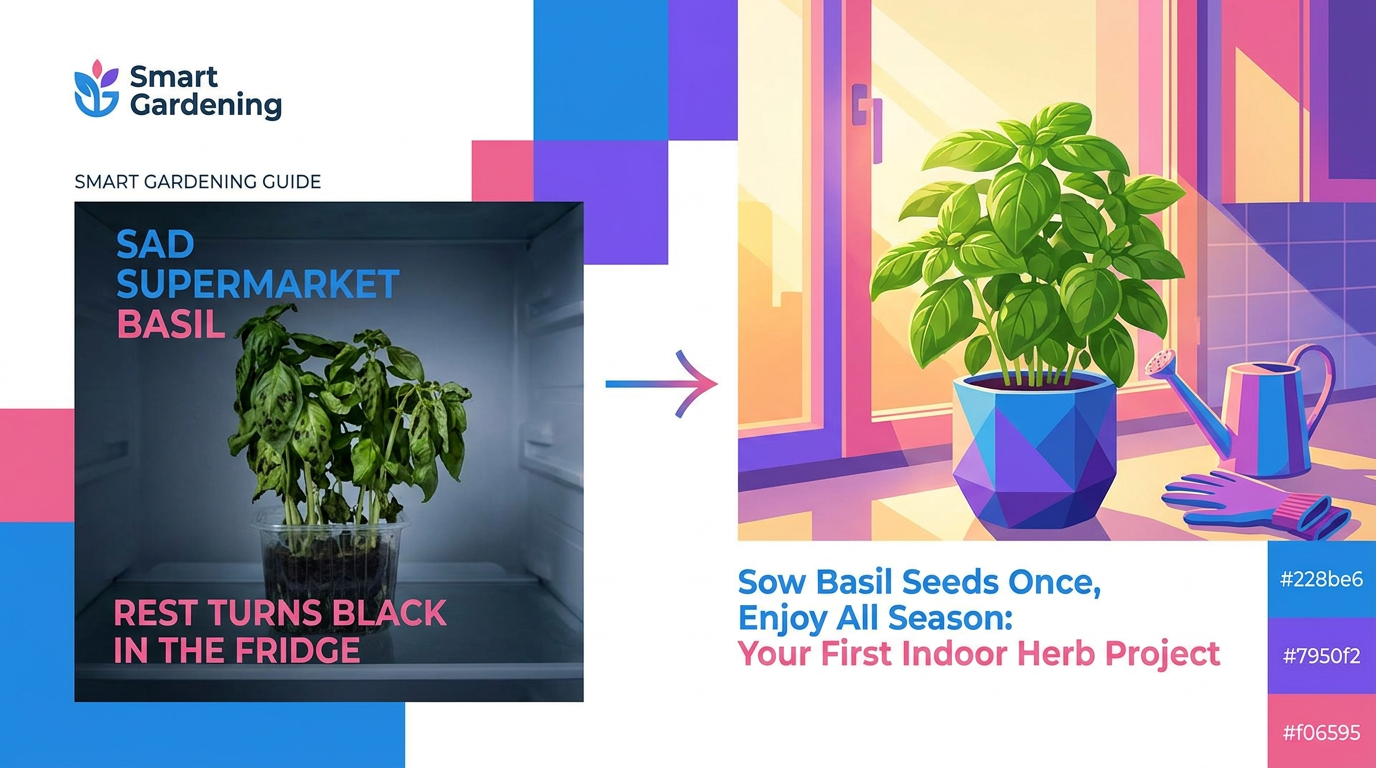
You buy a bunch of basil from the market, use five leaves, and the rest turns black in the fridge. Next week, you repeat the same thing. Meanwhile, that sunny kitchen window sits empty.
Growing herbs indoors feels like it should be easy. You toss a few basil seeds into a pot, water them lovingly… and get a thin forest of leggy stems that flop over and die, or a single tiny plant that never looks like the lush bush you see in photos. You’re not sure if you overwatered, underwatered, or used the wrong soil. So you give up and go back to sad supermarket basil.
Basil is actually the perfect “training‑wheels” plant. If you can grow one full, bushy pot of basil from seed indoors, you’ve quietly learned almost everything you need to grow other herbs and even small winter veggies in containers: how to pick soil, how to water, how much light you really need, and how to cut plants so they grow back instead of giving up.
This guide walks you through basil from packet to plate, step by step, and flags the exact moments where most beginners go wrong.
Why basil is the ideal first indoor crop
You could start with any herb, but basil gives you more room for small mistakes and more reward when you get it right.
Here’s why basil is a great beginner plant:
- Fast payoff: From seed to your first harvest is often just 4–6 weeks in warm, bright conditions.
- Visible feedback: When you under‑ or overwater, or don’t give enough light, basil shows it quickly. You learn fast.
- Forgiving growth habit: If you cut basil wrong once, it keeps growing. Do that with coriander or dill and they may bolt or stall.
- Endlessly useful: Basil goes in pasta, chutneys, salads, sandwiches, pizza, and even simple infused water.
Most of what you’ll do with basil—choosing containers, mixing soil, watering deeply but not constantly, pinching rather than plucking—applies directly to indoor mint, oregano, thyme, parsley, and many leafy vegetables you can grow in cooler months.
Think of basil as your indoor gardening simulator: low stakes, high learning.
What you actually need (and what you don’t)
You don’t need grow tents, expensive lights, or fancy fertilizers to get good basil. Start simple and get the basics right.
Essentials
- Basil seeds: Any packet labeled “basil” (Genovese, sweet basil, or Thai basil) works. For your first round, choose a common type like Genovese.
- Containers with drainage:
- 10–15 cm (4–6 inch) wide pots for individual plants, or
- One 20–25 cm (8–10 inch) wide pot to grow a compact “bush” of several plants.
- Reuse plastic nursery pots, ceramic pots with drainage holes, or even food tubs with holes you drill in the bottom.
- Saucers or trays: To catch extra water under your pots.
- Light source:
- A bright, sunny window (at least 4–5 hours of direct sun) on an east or south‑facing side is ideal.
- If your home is dim, a simple LED grow bulb or tube within 15–30 cm (6–12 inches) of the plants works.
- Potting mix: A light, fluffy potting mix for containers, not regular garden soil.
- Watering can or bottle: Something with a narrow spout for controlled watering.
Optional but very helpful
- Seed tray or small nursery pots: To start more seeds than you’ll eventually keep.
- Perlite or coarse sand: To improve drainage in heavy mixes.
- Liquid fertilizer: A mild, balanced organic fertilizer or seaweed extract.
- Spray bottle (mister): For gentle moistening of freshly sown seeds.
What you can skip (for now)
- Self‑watering pots with complicated reservoirs.
- Expensive “herb garden kits” with special pods.
- Strong grow lights with timers and fancy spectrums.
Those tools can be useful later, but they won’t fix basic mistakes with soil, light, and watering. Master basil with simple gear first; you can always upgrade once you know what you want.
Picking the right basil seeds (and how many to use)
A seed packet looks tiny, so beginners often dump the entire thing into one pot. That’s the first mistake.
Which basil variety to start with
You’ll see many types:
- Genovese or Sweet basil: Classic for pesto and everyday cooking. Reliable and fast. Choose this for your first attempt.
- Thai basil / Holy basil (Tulsi): Great flavor, slightly different growth habit, often more tolerant of heat.
- Purple basil, lemon basil, cinnamon basil: Fun later, once you’re comfortable.
For your first round, buy one packet of Genovese or sweet basil seeds.
How many seeds per pot
Aim for 2–4 strong plants per 20–25 cm (8–10 inch) pot, or 1–2 plants in a 10–12 cm (4–5 inch) pot.
Because not every seed will sprout and survive, you’ll sow more than you plan to keep and thin them out.
As a rule of thumb:
- For a small 10–12 cm pot, sow 6–8 seeds, evenly spaced.
- For a larger 20–25 cm pot, sow 12–16 seeds.
Later, you’ll remove extras so the remaining plants have space to branch and get bushy.
This “sow a bit more, then thin” pattern works for many other herbs and leafy veggies too.
Mixing and filling the potting soil the right way
Good soil is the difference between basil that sulks and basil that explodes with growth.
Skip garden soil indoors
Soil from your yard is usually:
- Too heavy for containers.
- Poorly drained.
- Full of weed seeds and disease.
Indoors, this quickly turns into a soggy, compacted mess.
Basic potting mix recipe
If you’re buying ready‑made soil, look for bags labeled “potting mix” or “container mix.” If it’s labeled “garden soil,” leave it on the shelf.
For basil, a simple mix works well:
- 2 parts standard potting mix
- 1 part cocopeat or peat moss (for moisture balance)
- 1 part perlite or coarse sand (for drainage)
If mixing feels like too much work, you can:
- Use straight potting mix, then
- Add a bit of perlite or sand only if it looks dense and heavy.
How to fill the pots
- Cover drainage holes with a small scrap of mesh, broken pot shard, or even a flat stone so soil doesn’t wash out.
- Fill the pot with your mix, up to about 2–3 cm (1 inch) below the rim. The gap helps you water without overflow.
- Tap the pot gently to settle the soil. Don’t press hard; you want it slightly firm, not packed.
- Pre‑moisten the mix: Water deeply once so it’s evenly moist but not soggy. Let extra water drain away before sowing.
This step—starting with evenly moist soil—helps basil seeds germinate quickly and evenly.
Step‑by‑step: sowing basil seeds so they actually sprout
Basil seeds are tiny, but the process is simple once you know the depth and spacing.
Depth and spacing
Basil seeds should be sown very close to the surface. A good rule: no deeper than 2–3 mm (about the thickness of a coin).
Follow this process:
- Moisten the soil in your pot so it feels like a wrung‑out sponge.
- Sprinkle seeds on top, roughly evenly spaced (use the seed counts from earlier).
- Cover lightly:
- Sprinkle a very thin layer of dry potting mix or cocopeat over the seeds.
- You should still be able to see the dark shapes faintly if you look closely.
- Mist the surface with a spray bottle until the top is damp but not muddy.
- Label your pot (variety and date). This matters if you start other herbs later.
Germination conditions
Basil likes warmth to sprout:
- Ideal temperature: 20–30°C (68–86°F).
- Location: A warm room, away from cold drafts and not pressed against a freezing window at night.
- Light at this stage: Basil seeds will germinate in light or darkness, but placing them in a bright spot from day one makes things easier.
If your air is very dry, you can:
- Loosely cover the pot with a clear plastic bag or a piece of transparent plastic to hold humidity.
- Leave some space for air; don’t seal it tight.
Check daily. Seeds usually sprout in 4–10 days. As soon as you see green, remove any cover and move the pot to your brightest possible spot.
Light, water, and warmth: the “care triangle” for indoor basil
Most indoor basil fails because of this triangle: too little light, too frequent watering, and cool temperatures.
Nail these three and your plants almost take care of themselves.
Light: more than you think
Indoors, glass and walls steal a lot of light. A window that looks bright to your eyes might be weak for plants.
Aim for one of these setups:
- Best: A sunny east or south‑facing window where direct sun hits the leaves for 4–6 hours.
- Good: A bright window plus a simple LED grow bulb 10–20 cm (4–8 inches) above the plants, on for 12–14 hours a day.
Signs you need more light:
- Seedlings stretch tall and thin, leaning towards the window.
- Leaves look pale green and spaced far apart.
You won’t fix leggy plants with water or fertilizer; only more light helps.
Water: deep, not constant
New growers often “love” basil to death with tiny daily sips of water.
A better pattern is:
- Water deeply until water drains out the bottom.
- Discard the extra water from the saucer after 10–15 minutes.
- Wait until the top 2–3 cm (about a finger’s depth) of soil feels dry before watering again.
Frequency will depend on your climate:
- Hot, dry rooms: every 1–2 days.
- Cooler, humid rooms: every 3–5 days.
Use your finger, not the calendar.
Overwatering signs: Yellowing lower leaves, droopy but soft stems, soil smells musty.
Underwatering signs: Limp, droopy leaves that perk up within hours of watering.
Warmth: basil hates the cold
Below about 15°C (59°F), basil slows down or sulks.
To keep it comfortable:
- Move pots away from cold window glass at night.
- Don’t place basil right under an AC vent.
- In very cool homes, keep basil in the warmest room or near the kitchen where temperatures tend to be higher.
If you keep the room generally comfortable for a person in a light shirt, your basil will probably be fine.
Thinning, transplanting, and shaping basil into a bush
After 2–3 weeks, your pot will be full of small plants. This is where most beginners freeze. Everything looks green and precious, and the idea of pulling out plants feels wrong.
Thinning: why removing seedlings is necessary
If you leave every seedling, they compete for light, food, and water. You end up with many weak, spindly plants instead of a few strong, bushy ones.
Here’s what to do when seedlings have 2–4 true leaves (not just the first tiny pair):
- Pick the strongest ones: Look for stocky, upright seedlings with thicker stems.
- Thin the rest:
- Use small scissors to snip weaker seedlings at the soil line, or
- Gently tug them out if the roots are not tangled.
- Goal: End up with about:
- 1–2 plants in a small 10–12 cm pot.
- 3–4 plants in a 20–25 cm pot.
You can eat the tiny thinned seedlings in salads or on top of toast.
This “sow thicker, then thin hard” habit is also key for salad greens and other leafy vegetables.
Transplanting (optional)
If you started seeds in a tray or many in a temporary pot, you can move the best seedlings later.
Wait until they have 3–4 pairs of true leaves. Then:
- Fill new pots with moist potting mix.
- Use a spoon or small tool to gently lift seedlings with a bit of soil around the roots.
- Make a hole in the new pot, place the seedling, and firm the soil gently around it.
- Water carefully to settle roots and avoid air pockets.
Try not to pull seedlings by the stems—stems are fragile; handle by leaves or the soil clump.
Pinching to make basil bushy
Left alone, basil grows tall and thin, then flowers early. You want it short, full, and leafy.
The trick is pinching:
- Wait until a basil plant has at least 3 sets of true leaves along the stem.
- Find the top growing tip—the newest pair of small leaves at the very top.
- Pinch or cut that top section off, just above a lower leaf pair.
Within a week or two, you’ll see two new branches emerge from the nodes just below your cut.
Repeat this every time a stem grows 2–3 new leaf pairs. Each pinch doubles your branches and the potential for more leaves.
This pinching pattern also works for mint and many other herbs.
Harvesting basil so it keeps growing all season
The first time you see a full pot of basil, you may just pluck a leaf here and there from the bottom. That’s actually the least effective way to harvest.
When you can start harvesting
You can take a small harvest when plants are about 15 cm (6 inches) tall and have several sets of leaves. If you pinched earlier as described, you’ll see side branches forming.
How to harvest for regrowth
Use scissors or your fingers to cut entire stems, not single leaves:
- Choose a stem that’s at least 10–15 cm (4–6 inches) long.
- Look for a pair of healthy leaves lower down the stem.
- Cut just above that leaf pair.
This is the same idea as your early pinching. Every time you cut, two new branches form below the cut. Over time, you get a compact, very leafy plant.
Try to:
- Never remove more than one‑third of the plant’s total leaves at once.
- Harvest regularly (every week or so) to keep basil in a leafy growth phase.
Dealing with flowers
As soon as you see little flower buds forming at the tops of stems:
- Pinch them off along with a bit of stem.
Flowering shifts energy away from leaves and changes flavor. Removing buds keeps basil tender and tasty.
Storing basil after harvest
Use it fresh whenever possible. If you have more than you can use:
- Short term (1–2 days):
- Keep stems in a glass of water on the counter, like a bouquet. Don’t refrigerate; cold damages basil.
- Longer term:
- Blend leaves with a little oil and freeze in ice cube trays.
- Chop and freeze plain in small airtight containers for cooking.
Drying basil is possible, but it loses much of its fragrance. Freezing preserves more flavor.
Common basil problems and simple fixes
Even with good care, you might hit a few bumps. The good news: indoor basil gives clear clues.
1. Seedlings fall over and die at soil level
Likely cause: Damping‑off disease from soggy, poorly ventilated soil.
Fix and prevent:
- Use fresh, sterile potting mix.
- Avoid overwatering in the earliest days.
- Provide gentle air movement (open a window a bit, or use a small fan on low, not blowing directly).
2. Seedlings grow long, thin, and pale
Likely cause: Not enough light.
Fix:
- Move closer to a brighter window.
- Add a simple LED grow light.
- Next time, place seeds in a brighter spot from day one.
3. Yellowing leaves, especially lower ones
Possible causes:
- Overwatering: Check if soil is constantly wet and heavy.
- Nutrient deficiency (in older, heavily harvested plants): They may need a gentle feed.
Fix:
- Let soil dry out more between watering.
- After 4–5 weeks, start a mild liquid fertilizer once every 2–3 weeks, at half the recommended strength.
4. Brown, crispy edges on leaves
Likely causes:
- Underwatering.
- Very dry air (especially in AC‑heavy rooms).
Fix:
- Check soil more often and water deeply each time.
- Group plants together to raise local humidity, or place a tray of water nearby (not under the pot).
5. White bugs or sticky leaves
Possible problem: Aphids, whiteflies, or mealybugs.
Fix:
- Rinse leaves gently in the sink.
- Wipe with a damp cloth or use a mild soapy‑water spray (a few drops of mild liquid soap in a liter of water). Rinse leaves a few hours later.
- Keep windows screened if these pests come from outside.
Solving one or two of these issues with basil gives you real confidence to troubleshoot other herbs and indoor veggies.
Using your basil skills on other winter‑friendly herbs and veggies
Once you’ve grown a thriving pot of basil from seed, you’re ready to branch out. The same core skills—soil, light, watering, thinning, pinching—apply to many edible plants you can keep indoors or on a sheltered balcony.
Here’s how to extend what you learned:
Herbs that behave like basil
These are fairly forgiving and grow well in containers:
- Mint: Likes consistently moist soil and can tolerate a bit more shade. Use the same potting mix; pinch often or it’ll get leggy.
- Oregano and marjoram: Prefer slightly drier soil. Same light needs; pinch tops for bushy growth.
- Lemon balm: Similar to mint; loves regular pinching and bright, indirect light.
Basil taught you:
- How to avoid soggy soil.
- Where the brightest window is in your home.
- How to pinch for branching.
Apply that, adjust watering slightly, and these herbs will follow.
Leafy vegetables you can grow with the same method
In cooler months, many leafy greens behave like a cross between basil and salad lettuce:
- Lettuce mixes and baby greens: Sow a bit thicker, harvest by cutting leaves 5 cm (2 inches) above soil level.
- Spinach: Likes cool weather and deeper containers but appreciates the same loose soil and deep watering.
- Rocket (arugula): Very fast, loves bright light, and takes well to repeated cutting.
Remember the pattern:
- Sow more seeds than you need.
- Thin for stronger plants.
- Water deeply, not constantly.
- Harvest by cutting above a leaf node so plants regrow.
If your basil did reasonably well, your odds with these crops are already high.
A simple indoor basil routine you can actually stick to
To make this easy to maintain, build a very short routine around your basil.
Daily (30–60 seconds)
- Check the top of the soil with your finger.
- Look at the leaves for droop, spots, or bugs.
- Rotate the pot a quarter turn if it’s leaning toward the light.
Every 2–4 days (depending on climate)
- Water deeply if the top few centimeters are dry.
- Empty the saucer after 10–15 minutes.
Weekly
- Pinch or cut any tall tips to encourage branching.
- Remove any flower buds forming at the top.
- Take a small harvest for cooking.
Every 2–3 weeks (after the first month)
- Give a light feed with diluted liquid fertilizer.
Once you’ve done this for a month, you’ll find yourself doing the same quick checks and actions on any other herbs or vegetables you add to your indoor garden.
Basil is a small plant, but growing it well teaches big lessons. From one packet of basil seeds and a sunny windowsill, you learn to read soil moisture with your fingers, see what “enough light” really looks like, and shape plants with a simple pinch of your fingers.
That’s the foundation that makes future steps—like choosing easy green vegetables for your balcony, or comparing grow bags and pots—feel straightforward instead of overwhelming.
For now, keep it simple: one pot, one packet of seeds, a bright spot, and the promise of fresh basil leaves you can snip straight into your next meal.