What to Ask at Your Local Garden Center Before You Plant a Single Veggie
You walk into the garden center with good intentions and an empty cart. Fifteen minutes later, you’re standing in front of a wall of potting soils, five different tomato varieties, and fertilizers with numbers that make no sense.
An hour after that, you’re driving home with whatever “looked good” and whatever the nearest staff member vaguely waved at. A month later, half of it is dead, the other half is sulking, and you’re wondering if growing your own vegetables was a mistake.
It wasn’t a mistake. You just weren’t given the right script.
A visit to a good nursery or a place like Al’s Garden Center can set up your whole season—if you know exactly what to ask, what to ignore, and what to walk out with.
This article is that script.
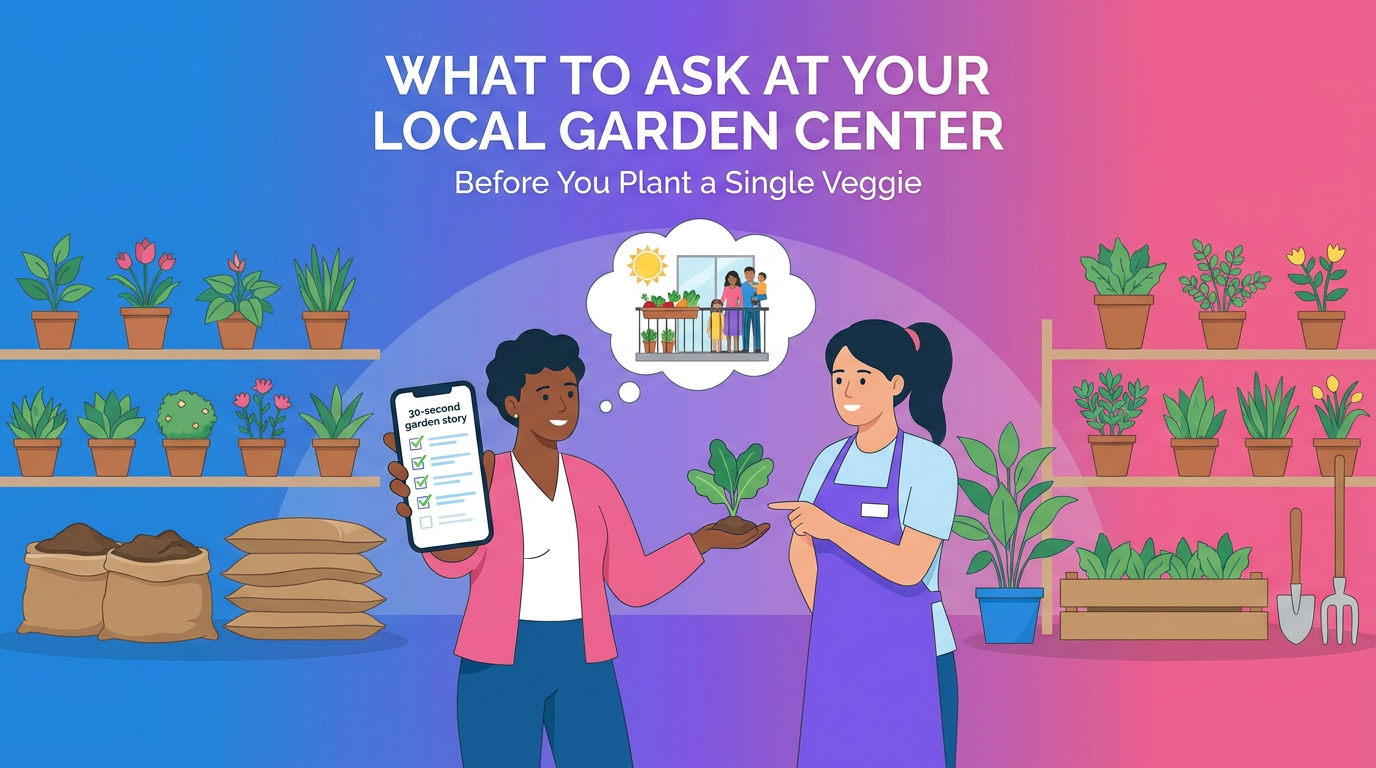
Walk in with a 30‑second “garden story” ready
If you open with “I want to grow vegetables,” staff have to guess. If you give them a clear, 30‑second picture, they can actually help.
Before you go, write this on your phone and be ready to read it out loud:
“I have a [balcony/patio/yard], about [X by Y feet]. It gets sun from about [time] to [time]. I want easy vegetables for [salads/stir‑fries/kids’ snacks]. I’m a beginner and I’d rather start with plants than seeds.”
Fill in the brackets honestly. Then add any deal‑breakers:
- Only containers, no digging in the ground
- Super hot afternoon sun
- Pets or kids that might dig in the soil
- No hose, just watering can
When you arrive, find a staff member who looks like they actually garden (dirty hands, talking about plants, not just running the cash register), and say your garden story first.
Your opener might sound like this:
“Hi, I’m new to growing vegetables. I have a tiny balcony that gets sun from 10 a.m. to 3 p.m. I’d like to grow things for salads, mainly in containers. Could you help me pick soil, pots, and a few starter plants?”
Now they have something real to work with—and you’ve signaled that you want basics, not a trunk full of expensive extras.
Start with sunlight: “Which veggies actually match my light?”
Most beginners gloss over sun, then wonder why tomatoes on a shady patio never ripen.
Your first real question after your garden story should be:
“Given that I have about [X] hours of sun, which vegetables will actually do well here?”
Good staff will then:
- Walk you to the right section (full sun vs partial shade plants)
- Steer you away from high‑sun crops if you don’t have enough light
- Suggest alternatives that fit your situation
Use this quick cheat sheet so you can tell if their suggestions make sense.
If you have 6+ hours of direct sun:
- Good: tomatoes, peppers, eggplant, cucumbers, beans, zucchini, most herbs
- Follow‑up question: “Of these, which stay smaller or do well in pots?”
If you have 4–5 hours of direct sun:
- Good: lettuce, spinach, arugula, chard, many herbs (parsley, cilantro, chives, mint)
- Borderline: cherry tomatoes in very bright conditions
- Follow‑up question: “What compact varieties handle only 4–5 hours of sun?”
If you have 2–3 hours of very bright light or dappled shade:
- Good: leafy herbs, some lettuces, microgreens
- Ask bluntly: “With this much light, is it realistic to try tomatoes or peppers, or should I stick to greens and herbs?”
Red flag answer:
- “Oh, tomatoes grow anywhere, you’ll be fine,” said without asking about your light. That’s often a sign of someone who sells plants, not grows them.
Soil aisle script: “Show me what I need for veggies in pots, not flowers in the ground”
The soil aisle is where carts go to die. Bags shout “organic,” “moisture control,” “garden soil,” “topsoil,” “raised bed mix”… and most of them are wrong for containers.
Walk to the bagged soil area and say:
“I’m growing vegetables in containers only. Which two or three specific products do you recommend as potting mix for vegetables—and which ones should I avoid for pots?”
You’re fishing for answers that include words like “potting mix” or “container mix.”
What you want to hear
- “You want a potting mix or container mix for anything in pots.”
- “Avoid garden soil or topsoil in containers; they’re too heavy.”
- “For veggies, skip the mixes with water‑absorbing crystals or ‘moisture control’ if your containers don’t have great drainage.”
Then ask this follow‑up:
“If I want to keep this simple and affordable, what’s the one bag I should buy for all my vegetable pots?”
They may suggest:
- A general all‑purpose potting mix
- A potting mix labeled for vegetables and herbs
That’s your base. You don’t need compost, manure, and five amendments right now.
Simple shopping rule for soil
- Going in pots? Only buy products labeled “potting mix,” “container mix,” or “raised bed mix” that explicitly say “for containers.”
- Words to skip for containers: garden soil, topsoil, fill dirt, planting mix for trees and shrubs.
If you’re planting in an actual ground bed (from article 3), ask:
“This bed is [X by Y feet] and the existing soil is [clay/sandy/rocky]. What’s a simple way to improve just the top 15–20 cm for vegetables?”
You’re looking for:
- “Compost” or “well‑rotted manure” as soil improvers
- Advice about mixing, not burying layers of different soils on top of each other
Red flag answers:
- “Just fill the whole bed with potting soil, you’re good.” (Very expensive and not necessary.)
Container questions that save you from root‑bound sadness
You’ve read about grow bags (you’ll get a full compare in article 11), but in a garden center you’ll see clay pots, plastic, wood planters, hanging baskets, and occasionally grow bags.
Most people pick by color. You’re going to pick by root room.
Stand in front of the pots and ask:
“Which pot sizes do you recommend for one tomato plant, one pepper plant, and a small mixed pot of salad greens?”
You’re testing whether staff pair specific crops to specific volumes.
Good baseline answers:
- Tomatoes: at least 18–20 inches (45–50 cm) across, or 20–30 liters
- Peppers: 10–12 inches (25–30 cm) across, or 10–15 liters
- Salad greens: 6–8 inches (15–20 cm) deep, long window boxes or bowls work well
Then ask:
“Are there any pots here that look big but don’t actually work well for veggies?”
You want them to warn you about:
- Pretty, shallow bowls that dry out too fast
- Tiny decorative pots for “patio tomatoes” that stunt growth
- Heavy, no‑drainage planters unless you’re willing to drill holes
Smart container checklist you can follow
Use this quick list while you’re standing there, even if no one is free to help:
- Every container must have drainage holes at the bottom.
- Bigger is almost always better for tomatoes, peppers, and eggplant.
- Dark pots in hot climates dry out faster; lighter colors reflect heat.
- If lifting is a problem, aim for several medium pots instead of one huge one.
If they sell grow bags:
“For a beginner, are grow bags or rigid pots easier to manage here, considering our summer heat and watering needs?”
This sets you up nicely for when you read the detailed grow bag vs pot breakdown in article 11.
Starter plant script: “Which of these are beginner‑proof?”
The transplant tables often look like a candy store: fifty tomato varieties, six kinds of cucumbers, eggplants you’ve never heard of.
Your job is not to collect them all.
Lead with this:
“Given my sun and container size, which three to five vegetable varieties here are the most forgiving for beginners?”
Push for varieties, not just species:
- “Which cherry tomato is most reliable in pots?”
- “Which bush cucumber stays compact and doesn’t need a huge trellis?”
What good staff might suggest
- Cherry tomatoes labeled “patio,” “balcony,” or “container” types
- Compact peppers (often called “lunchbox” or “mini bell” types)
- Bush beans instead of pole beans for small spaces
- Leaf lettuces and cut‑and‑come‑again salad mixes
Once you’ve got a few names, ask:
“For each of these, how big will the plant actually get, and how many fruits or harvests should I reasonably expect in a pot?”
They may not give exact numbers, but you want ballpark expectations, like:
- “This cherry tomato might give you a handful every few days by mid‑summer.”
- “You’ll cut that lettuce several times before it gets bitter.”
That helps you avoid disappointment later.
Seedlings red flag checklist
Before you put any plant in your cart, check these things yourself:
- Leaves: no yellowing, no brown spots, no white powder.
- Stems: firm, not floppy or snapped.
- Roots: if you can gently loosen the pot, roots should be white and not a tight circling mass.
- Size: avoid the biggest monsters in the tray; slightly smaller, stocky plants transplant better.
If you see aphids, spider webs, or fungus gnats flying up when you touch the soil, pick a different tray.
If staff try to shrug off obviously sick plants, that’s a sign to be cautious with anything living from that section.
Fertilizer and pest control: “What’s the simplest thing that actually works?”
You do not need a different fertilizer for every plant in your cart. You also don’t need a chemical arsenal “just in case.”
In the fertilizer aisle, hold back and ask:
“If I want to keep this beginner‑friendly, what is one all‑purpose fertilizer that works well for vegetables in pots?”
Look for:
- Something labeled safe for edibles/vegetables
- Instructions that list a rate for containers
- Either organic or synthetic is fine; the key is simple, clear directions
Follow‑up question:
“How often should I use this in containers so I don’t overdo it?”
You want an answer in plain language:
- “Every 2 weeks at this dilution.”
- “Scratch in a small amount once a month.”
If they start listing five different specialized fertilizers, rein it in:
“If you had to pick just one for a beginner with only a few pots, which would it be?”
Pest control script
Don’t buy “just in case” sprays. Instead, ask:
“Which common pests usually show up on tomatoes and greens in this area, and what’s the first, mildest thing I should try if I see them?”
You’re looking to:
- Learn the names (aphids, whiteflies, caterpillars)
- Get one or two low‑impact options (insecticidal soap, neem oil, hand‑picking)
Then ask:
“If I’m not sure what’s on my plant, can I bring in a leaf in a bag or a photo and have someone identify it before I buy anything?”
A “yes” here is gold. It means you can get targeted help later rather than guessing and over‑treating.
Script for watering and local climate tips
You’ve already read about heat and water planning in the desert gardening article later in this series, but your local garden center knows how brutal or gentle your specific weather actually is.
Ask someone who clearly gardens locally:
“When summer really kicks in here, what are the biggest mistakes new container gardeners make?”
Listen for things like:
- “They don’t realize how fast pots dry out on balconies.”
- “They put tomatoes on a south‑facing wall with no shade and fry them.”
Then get specific:
“In July and August, with my setup, how often do you think I’ll be watering these pots? Once a day? Every other day?”
You’re not asking for a watering schedule to obey blindly; you’re asking for a range so you’re not shocked.
If your climate is hot and dry, follow with:
“Are there any cheap tricks you recommend here to help pots stay moist longer in this heat?”
Good, practical answers:
- Grouping pots together to shade the sides
- Using saucers only under very thirsty plants, and emptying excess
- Moving pots where they get morning sun and afternoon shade
This is where staff can also point you to:
- Mulch options for the top of containers (straw, bark, coco chips)
- Simple drip irrigation kits or watering spikes if you struggle with consistency
Exact phrases for when staff try to oversell you
Not every garden center is pushy, but it helps to have polite phrases ready so you keep control of your cart.
Use these word‑for‑word if needed.
1. The too‑many‑plants problem
Staff: “You’ll want at least four tomato plants if you like tomatoes.”
You:
“I’d rather start small and succeed. I’ll take one tomato and we’ll see how it goes.”
2. The “you need every product” pitch
Staff: “You really should get this root stimulator, plus this bloom booster, plus this veggie fertilizer…”
You:
“I’m just starting and want to keep this simple. What’s the one product you’d pick if you were in my shoes?”
3. The decorative‑over‑practical upsell
Staff: “These pretty glazed pots would look amazing on your balcony.”
You:
“They are gorgeous, but I’m focused on growing food first. Which pots give the best root space for the price?”
4. The seed overload
Staff: “Why not grab some seed packets too—cucumbers, melons, pumpkins…?”
You:
“For this first season, I’m sticking with seedlings only. I’ll try seeds later once I’m comfortable.”
Firm, clear boundaries usually earn respect—and they keep you from spending on things that add stress instead of harvests.
Your beginner‑friendly shopping list (with permission to skip a lot)
You don’t need half the store. For a small balcony or patio veggie start, a realistic list looks more like this.
Core items you likely do want
- Potting mix for containers
- Enough to fill your chosen pots; staff can help estimate bags.
- Containers with drainage
- Sizes matched to your chosen crops (e.g., 1 large for tomato, 1 medium for peppers, 1–2 shallow for greens).
- Starter plants (seedlings)
- 3–6 plants total is plenty for a first try: maybe 1 tomato, 1 pepper, 1 pot of herbs, 1–2 pots of greens.
- One all‑purpose veggie‑safe fertilizer
- Liquid or granular, with clear instructions for containers.
- Labels and a marker
- So you remember which variety is which.
Simple extras that genuinely help
- Mulch for pots (a small bag of straw, bark, or coco chips)
- One sturdy stake or tomato cage if you’re growing indeterminate tomatoes
- A watering can or hose nozzle with a gentle shower setting
Things you can skip for now
- Multiple specialty fertilizers (tomato‑only, bloom booster, etc.)
- Big pest control kits or harsh insecticides “just in case”
- Fancy self‑watering planters that cost more than your plants
- Indoor grow lights (unless you’re in a very low‑light home and have already decided to go that route)
If in doubt, ask yourself at the shelf: “Does this help me plant, water, or feed my veggies more easily this month?” If not, it can probably wait.
How to leave with a plan, not just a cart
The final five minutes of your visit are as important as the first five.
With your cart ready, find a staff member one more time and say:
“Before I check out, can we quickly walk through when I should plant each of these, how deep, and roughly how far apart they should be in their pots?”
Have them:
- Confirm you’re planting in the right season for each plant
- Show you on a tag or with fingers how deep the transplant should go
- Clarify if a pot is for one big plant or a small cluster
Then ask two final questions:
- “What should I do with these plants in the first 24 hours after I bring them home?”
- You want to hear: keep them watered, don’t leave them in a hot car, plant them in the next day or two, or keep them in bright shade if you can’t plant immediately.
- “If I run into trouble, what’s the best way to get help from you—bring a photo, a leaf sample, or the whole plant?”
- This turns your garden center into an ongoing support line, not just a store.
Walk out with:
- A short, written note in your phone (or on a receipt) with planting depth, spacing, and first‑fertilizing timing.
- Confidence that every single item in your cart has a job.
You’ll connect this trip with what you’ve already learned about choosing seedlings, container layouts, and crop choices in earlier articles—and you’ll be ready to try grow bags, special pots, and tougher climates in the ones ahead.
The goal isn’t to become an expert in one afternoon at a place like Al’s Garden Center. The goal is to come home with a small, sane, well‑matched starter kit for your space.
If you can walk in, say your 30‑second garden story, ask these questions, and leave with a cart that matches your answers, you’ve already done the hardest part of home vegetable gardening: starting wisely instead of randomly.