Beginner-Proof Green Vegetables You Can Grow in Pots at Home
You want that bowl of crisp home‑grown greens on your table, but the reality is… you’ve got a balcony, a tiny patio, or a sunny window ledge and not much else. The idea of digging up a yard or buying fancy raised beds feels overwhelming, so the dream gets pushed to "someday" again.
You don’t need a yard. You don’t need tons of time. You just need a few pots, the right soil, and the right green vegetables that forgive your mistakes and still give you real food. Think cut‑and‑come‑again salads, handfuls of spinach for omelettes, and a steady stream of herbs and tender greens almost on autopilot.
Why green vegetables are the easiest place to start
When you’re new to growing food, your first crops should be the ones that:
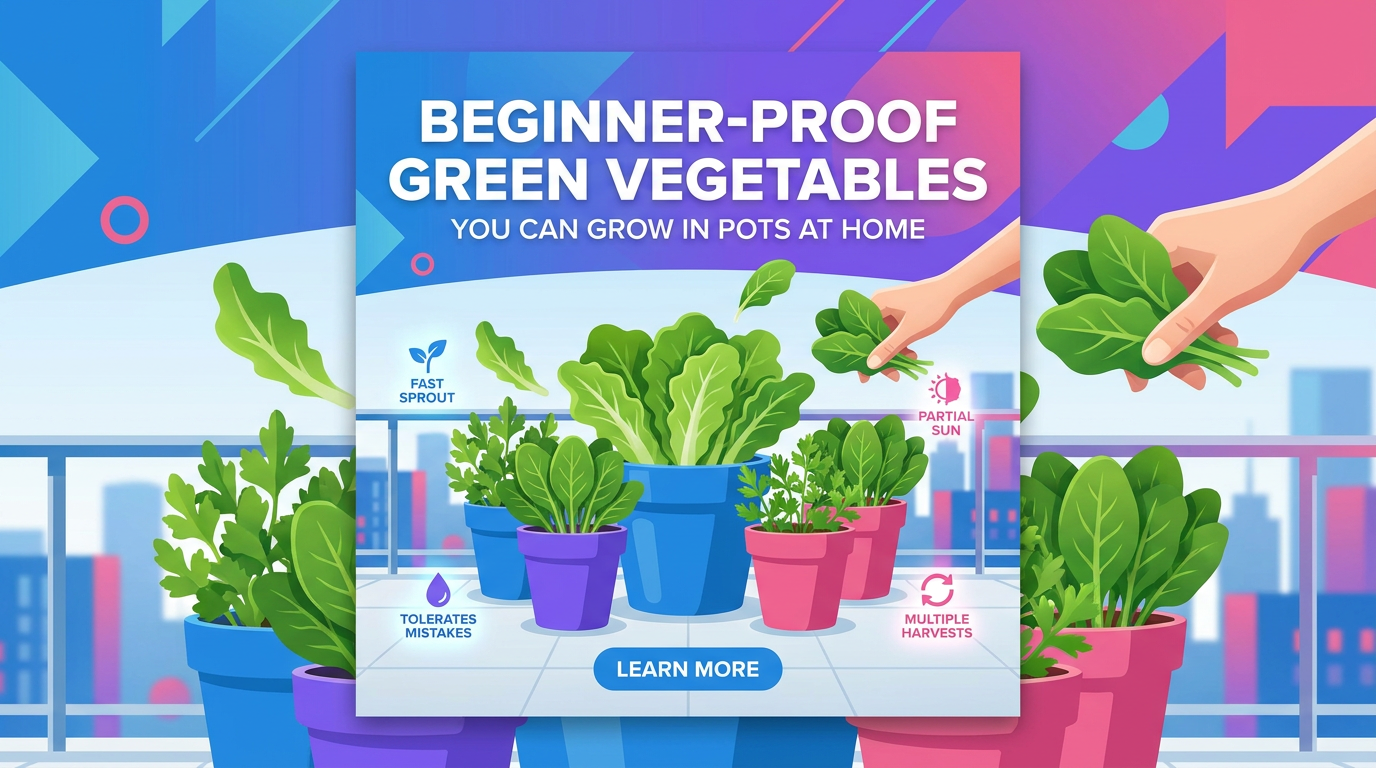
- Sprout fast so you see success quickly.
- Tolerate a bit of over‑ or underwatering.
- Don’t need perfect sun all day.
- Give multiple harvests instead of “one and done.”
Leafy and green vegetables tick all those boxes.
Most of them don’t need deep roots, so they’re happy in pots. Many will grow in partial sun, and plenty taste best when you harvest them young. If something goes wrong, you’re usually only 4–6 weeks away from another crop.
Compared with fruiting vegetables like tomatoes and peppers, greens:
- Use smaller containers.
- Mature faster.
- Need less fertilizer.
- Don’t rely on bees or hand pollination.
If you’ve followed earlier articles in this series, you’ve seen how to set up small spaces and pick beginner crops. Here we zoom into one simple goal: a steady, low‑stress supply of green vegetables from pots you can tuck almost anywhere.
How much sun your potted greens really need
Before you buy seeds or soil, get real about your light.
Stand in your growing spot and count how many hours of direct sun it gets between about 9 a.m. and 5 p.m. Actually look at the clock. Guessing "it’s pretty bright" leads to leggy, weak plants.
Use this as a rough guide:
- 2–3 hours of direct sun: Herbs and very shade‑tolerant greens only. Go heavy on mint, parsley, chives, and small harvests of baby lettuce or arugula.
- 3–4 hours of direct sun: Mixed salad greens, arugula, spinach, and most Asian greens will still do well, especially in cool seasons.
- 4–6 hours of direct sun: Ideal for almost all leafy greens in containers.
- 6+ hours of direct sun: Great for greens, but you’ll need more frequent watering in hot weather.
If you get strong afternoon sun that cooks your balcony, greens may scorch in summer. Two simple fixes:
- Shift your pots: Move them where they get morning sun and afternoon shade, or behind a light screen like balcony railings or a mesh.
- Seasonal timing: Grow cool‑loving greens in spring and autumn, and tougher greens like chard or Malabar spinach in peak summer.
Don’t talk yourself out of growing just because you don’t have six hours of sun. Plenty of green vegetables will reward even half‑decent light.
The one soil setup that works for almost every green
You don’t need a custom mix for each vegetable. If you’re growing in pots, one high‑quality mix can support nearly all your greens.
Look for bags labeled “potting mix” or “container mix” rather than garden soil or topsoil. On a balcony or terrace, skip heavy, clay‑based soils.
For happy green vegetables in pots, aim for:
- Light and fluffy texture: Roots need air as much as water.
- Good drainage: Water should run out of the drainage holes within a few seconds.
- Some slow‑release nutrition: Enough to carry quick greens through most of their life.
A simple formula that works:
- 2 parts quality potting mix
- 1 part well‑rotted compost or vermicompost
Mix them in a tub or on a plastic sheet before filling containers.
Optional but helpful:
- Coco peat or coconut coir: Boosts moisture retention in hot, dry climates.
- Perlite: Lightens heavy mixes and improves drainage if your pots stay soggy.
Avoid:
- Digging soil straight from the ground into pots. It compacts, drains poorly, and can bring pests and diseases.
- Manure that isn’t fully decomposed. It can burn young roots and smell.
For greens that stay in the pot 6–8 weeks, this simple mix plus one or two light feeds is usually all you need.
Pot sizes and layouts that keep greens coming
Green vegetables will grow in almost anything that drains, but starting with the right size pot saves you from constant watering and stunted plants.
Use this as a quick reference:
- Baby leaf lettuce mixes:
- Minimum: 15–20 cm deep, 20–30 cm wide trays, bowls, or boxes.
- Spacing: Broadcast seeds, then thin so leaves stand 3–4 cm apart.
- Head lettuces (like romaine, butterhead):
- Minimum: 20–25 cm deep, 25 cm wide.
- One plant per 20–25 cm pot.
- Spinach and fenugreek (methi):
- Minimum: 15–20 cm deep trough or pot.
- Sow thickly for baby leaves; thin to 5–8 cm apart for bigger leaves.
- Arugula / rocket:
- Minimum: 15–20 cm deep, 20–30 cm wide.
- Sow in rows or broadcast, thin to 3–5 cm apart.
- Kale:
- Minimum: 25–30 cm deep, 25–30 cm wide.
- One plant per 25 cm pot.
- Swiss chard:
- Minimum: 25 cm deep, 25–30 cm wide.
- One or two plants per 30 cm pot.
- Coriander (cilantro), dill, parsley:
- Minimum: 15–20 cm deep bowls or boxes.
- Sow thick for cut‑and‑come‑again leaves.
When space is tight, think in layers:
- A long window box or railing planter for mixed salad leaves.
- One or two deeper round pots for kale or chard.
- A couple of smaller pots tucked around them for herbs like mint and parsley.
You can harvest from the shallow boxes several times a week while the big pots quietly grow your "main" greens in the background.
Seven beginner‑proof green vegetables that love pots
You don’t need twenty seed packets. Start with a short list of forgiving greens, then add more once you know what you actually eat.
1. Leaf lettuce mixes (cut‑and‑come‑again)
Fast, flexible, and forgiving.
- Best for: Window boxes, balcony railings, wide shallow pots.
- Sun: 3–5 hours; prefers cool weather.
- Days to harvest: 25–35 days for baby leaves.
How to grow:
- Fill a wide pot or box at least 15 cm deep with your potting mix.
- Sprinkle seeds evenly over the surface like salting food.
- Cover lightly with 0.5–1 cm of soil, pat gently, and water with a fine spray.
- Keep the surface moist (not soaked) until germination.
Harvest‑often method:
- When leaves reach 8–10 cm tall, snip the outer leaves with scissors, leaving 3–4 cm of growth at the base.
- Don’t cut into the growing point in the center of each little plant.
- Return every 3–5 days to cut more; the same planting can feed you for 3–5 weeks.
2. Spinach
Spinach handles cool balconies, grows quickly, and doesn’t need deep soil.
- Best for: Troughs and medium pots.
- Sun: 3–5 hours, cooler seasons.
- Days to harvest: 30–45 days.
How to grow:
- Sow seeds about 1–2 cm deep, 4–5 cm apart, in rows.
- Thin to 5–8 cm apart once seedlings have two true leaves.
- Water whenever the top 2–3 cm of soil feels dry.
Harvest‑often method:
- For baby spinach, snip whole plants when leaves are the size you like.
- For continuous harvest, pick outer leaves, leaving the center to regrow.
- Once plants start to send up a tall central stalk (bolting), pull them and replant.
3. Arugula / rocket
Peppery and fast, arugula is a flavor boost in a small pot.
- Best for: Shallow, wide containers.
- Sun: 3–5 hours; tolerates light shade.
- Days to harvest: 20–30 days for baby leaves.
How to grow:
- Scatter seeds densely over the surface and cover very lightly.
- Water gently; seeds are small and wash away easily.
Harvest‑often method:
- Start snipping baby leaves at 7–8 cm tall.
- For milder flavor, harvest younger and avoid hot mid‑day sun.
- If plants get too spicy or tough, sow a fresh batch.
4. Swiss chard
Chard gives you large, glossy leaves for months from a single planting.
- Best for: Larger pots on floors or steps.
- Sun: 4–6 hours.
- Days to harvest: 45–60 days for big leaves; earlier for baby.
How to grow:
- Sow seeds 2–3 cm deep, or plant seedlings 20–25 cm apart.
- One plant per 25–30 cm pot works very well.
Harvest‑often method:
- Harvest outer leaves when they’re hand‑sized.
- Leave the inner young leaves to keep the plant growing.
- Keep removing yellowing or damaged leaves so energy goes to fresh growth.
5. Kale (curly or Tuscan)
Kale is tough, productive, and surprisingly happy in containers.
- Best for: Deep pots or grow bags.
- Sun: 4–6 hours.
- Days to harvest: 50–70 days.
How to grow:
- Plant one seedling in a 25–30 cm deep pot.
- Water consistently; kale doesn’t like drying out fully.
Harvest‑often method:
- Start picking lower, outer leaves once the plant is 20–25 cm tall.
- Always keep at least 5–6 leaves on the plant so it can refuel.
- A well‑cared‑for plant can produce for many months.
6. Coriander (cilantro) and parsley
Not technically “vegetables”, but herbs play the same role: frequent, leafy harvests.
- Best for: Bowls, boxes, and edges of bigger pots.
- Sun: 3–5 hours; avoid scorching mid‑day heat.
- Days to harvest: 25–40 days.
How to grow:
- Sow coriander seeds 1 cm deep; parsley seeds on the surface with a light cover.
- Keep moist; parsley especially is slow to germinate.
Harvest‑often method:
- Cut outer stems low, near the base, and leave the inner ones.
- Don’t strip all leaves at once; always leave some for regrowth.
7. Methi (fenugreek) or microgreens
For a very fast win, grow small, tender greens you harvest young.
- Best for: Shallow, wide trays and bowls.
- Sun: Bright light, partial sun.
- Days to harvest: 10–20 days.
How to grow:
- Pack seeds densely across the surface in a 5–10 cm deep tray.
- Keep evenly moist but never waterlogged.
Harvest‑often method:
- Cut with scissors when leaves are 5–10 cm tall.
- Most microgreens are “one‑cut” crops, but fenugreek and some others may regrow once.
Starting with any three or four of these will already give you variety and a long harvest window.
Simple planting schedule for continuous green harvests
The biggest mistake beginners make is planting everything on a single weekend. Four weeks later, you’re drowning in leaves for a few days, then everything bolts or burns out and you’re back to buying greens.
Staggering plantings takes almost no extra time and keeps greens coming.
Use this step‑by‑step pattern with three or four containers:
- Week 1:
- Pot 1: Lettuce mix.
- Pot 2: Spinach.
- Week 3:
- Pot 3: Arugula.
- Week 5:
- Pot 4: Lettuce mix again.
From about week 4 onwards:
- You’ll start harvesting baby lettuce and arugula.
- Spinach will follow shortly.
- As older containers slow down or get bitter, clear them and immediately sow another batch.
General timing rules:
- Re‑sow baby leaf salads every 3–4 weeks.
- Re‑sow arugula and quick Asian greens every 3 weeks.
- Chard and kale are longer‑term; plant once and feed them well.
You can mark simple reminders on your phone calendar: “Re‑sow lettuce in Pot 1” every four weeks. That one habit alone stops the feast‑or‑famine cycle.
Watering and feeding greens without overthinking it
Most new gardeners lose plants from inconsistent watering, not pests or “bad luck”. Containers dry out fast, especially on balconies and terraces.
Use this simple routine:
- Morning check: Stick your finger 2–3 cm into the soil.
- If it feels dry at that depth, water.
- If it’s still slightly damp, wait.
- How much to water:
- Water until you see a steady trickle coming from the drainage holes.
- Empty saucers so roots aren’t sitting in water.
In hot, windy weather you may water daily. In cool or rainy periods, you might skip a day or two. Avoid multiple small sips; deeper, less frequent watering encourages stronger roots.
Feeding is easier than it sounds:
- Greens have modest needs, especially if your potting mix already contains compost.
- Once every 2–3 weeks, use one of these:
- A diluted liquid organic fertilizer.
- A handful of vermicompost scratched into the top 2–3 cm of soil.
Stop fertilizing 1–2 weeks before you expect to clear a pot, and start again after you sow or plant the next batch.
Watch your plants:
- Pale leaves, slow growth: Likely need food.
- Wilting even in moist soil: Check drainage and pot size; roots may be cramped.
Greens respond quickly, so small adjustments in watering and feeding show up in better color and faster regrowth.
Fast fixes for droopy, bitter, or tiny greens
Even forgiving plants throw you some curveballs. These are the most common issues in potted green vegetables and how to handle them.
Droopy or floppy seedlings
Cause: Too little light or overwatering.
Fix:
- Move pots to a brighter spot (even an extra hour of sun helps).
- Water only when the top 2–3 cm of soil is dry.
- Thin overcrowded seedlings so remaining ones get more light and air.
Leaves taste bitter or tough
Cause: Heat stress, plants too old, or bolting.
Fix:
- Harvest leaves younger.
- Shift pots where they get morning sun and afternoon shade.
- Choose heat‑tolerant varieties (e.g., certain leaf lettuces, Malabar spinach) for summer.
- If a plant has fully bolted (tall flower stalk), clear the pot and sow fresh seed.
Tiny stunted plants that never seem to grow
Cause: Shallow pots, poor soil, or rootbound seedlings.
Fix:
- Repot into deeper containers with fresh potting mix.
- Mix in compost to boost nutrients.
- Avoid starting with large, pot‑bound nursery seedlings for greens; smaller is better.
Yellowing leaves, especially at the bottom
Cause: Natural aging, underfeeding, or waterlogging.
Fix:
- Remove yellow leaves promptly.
- Improve drainage (drill extra holes if needed, add perlite next time).
- Apply a light feed of compost or liquid fertilizer.
Tiny holes or chewed edges
Cause: Caterpillars, slugs, or beetles.
Fix (no sprays needed for mild damage):
- Inspect the undersides of leaves and hand‑pick any pests.
- Water in the morning, not at night, to discourage slugs and snails.
- Use simple barriers like copper tape or crushed eggshells around pot edges if slugs are a big problem in your area.
Most cosmetic damage on greens is harmless. If the plant still looks mostly healthy, keep harvesting.
Harvest‑often methods that make small pots feel big
The fastest way to stunt your greens is to let them sit untouched until they’re overgrown, then hack everything off at once. Your goal is the opposite: light, regular harvesting.
Use these rules for most leafy and green vegetables:
- Start early: Begin harvesting when leaves are about the size you’d eat in a salad, even if the plant looks “small.”
- Take the outer leaves: For rosette‑forming plants (lettuce heads, spinach, kale, chard), pick from the outside and leave the center intact.
- Never strip a plant bare: Always leave at least one‑third of the leaf area so it can continue photosynthesis and regrow.
- Harvest in the cool of the day: Early morning or evening gives crisper, sweeter leaves and less stress on plants.
For densely planted salad mixes:
- Use scissors to give the pot a “haircut” 3–4 cm above the soil.
- Water and lightly feed afterwards.
- Repeat every few days until regrowth slows or leaves become tough.
This technique can double what you get from a single container compared with pulling entire plants at once.
Turning today’s pots into a bigger home veggie plan
Once you’ve grown even one or two successful pots of greens, you’ve learned skills you can reuse for almost any home vegetable:
- Matching crops to your available sun.
- Choosing containers and soil that drain well.
- Watering so roots stay moist but not flooded.
- Harvesting in ways that keep plants productive.
From here, you can:
- Add a pot of basil or mint to sit beside your lettuce and arugula.
- Try compact fruiting crops in separate, deeper containers as you gain confidence.
- Experiment with grow bags versus rigid pots to see which fits your space and watering style best.
You don’t have to overhaul your entire space at once. Even two well‑managed boxes of salad greens and a single pot of kale can noticeably cut what you buy from the market.
Start with the containers you already have, fill them with a reliable potting mix, pick three or four of the beginner‑proof greens above, and plant small batches every few weeks. A steady supply of fresh, crisp green vegetables from your balcony, windowsill, or patio is a lot closer than it looks right now.