Can You Use Orchid Pots for Veggies? Smart Container Hacks That Actually Work
You’ve got the itch to grow your own vegetables, but every time you price out new containers, your total cart makes you quietly close the browser tab.
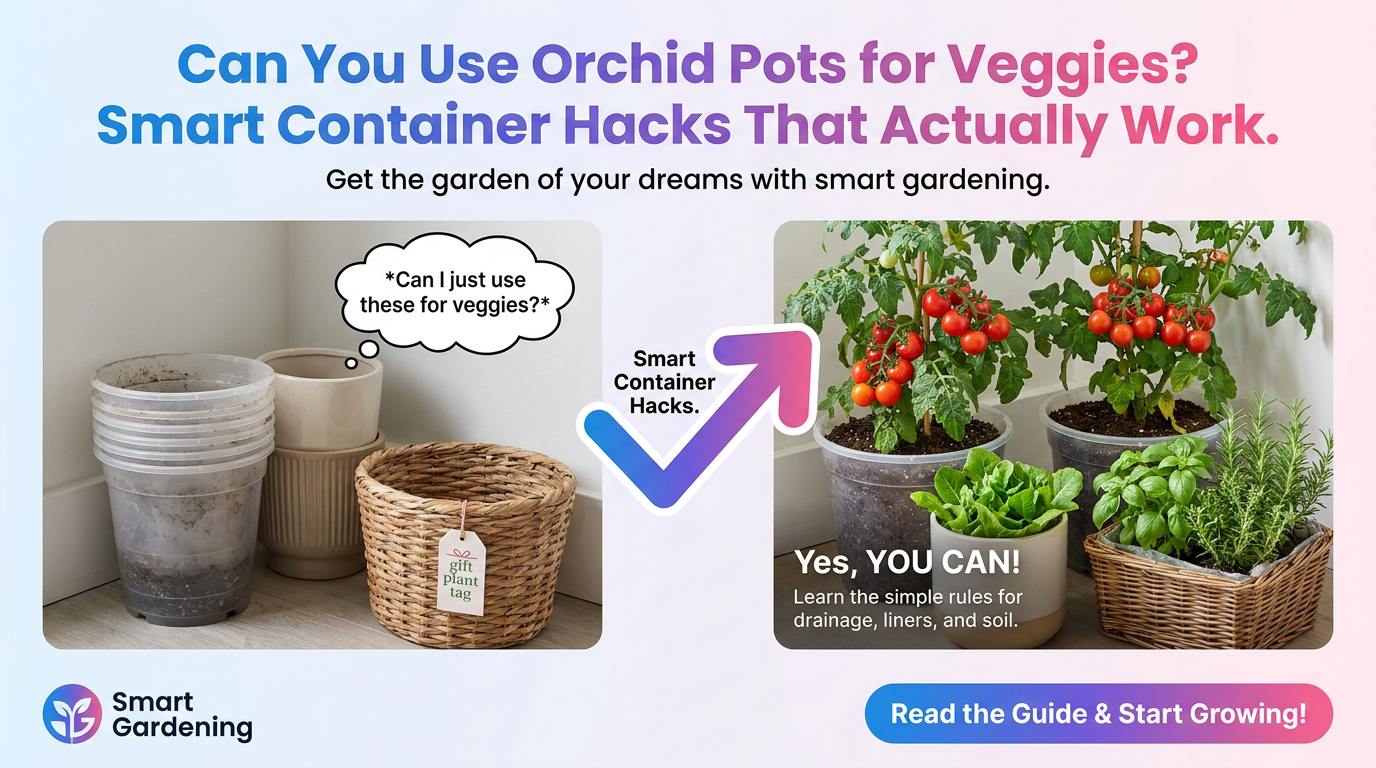
Then you notice the stack of orchid pots in the corner. Or the ceramic cachepots you never use. Or the pretty basket that held a gift plant once and has been collecting dust ever since.
The question pops up: Can I just use these for veggies? Or is that how you end up with sad, stunted plants and soggy soil?
You absolutely can repurpose orchid pots and other specialty containers for vegetables — if you understand a few simple rules about drainage, liners, and soil. Get these wrong, and even the toughest cherry tomato will sulk. Get them right, and you’ve just created a budget-friendly, great-looking veggie garden from “junk” you already own.
This guide shows you exactly what works, what to avoid, and how to fix tricky pots so your vegetables actually thrive.
The big problem with fancy plant pots
Most decorative or specialty pots — orchid pots, cachepots, gift planters — are designed around the plant looking good, not necessarily growing well.
They usually have one or more of these issues:
- Too few or too small drainage holes
- No drainage holes at all
- Very narrow bottoms and wide tops (easy to tip, hard to water well)
- Glazed sides that hold water in
- Odd shapes that trap wet pockets of soil
Vegetables, on the other hand, are needy:
- They drink a lot of water, but hate sitting in it.
- They need consistent moisture, not swampy roots.
- They need enough soil volume for roots to spread.
So the core problem isn’t whether the container says “orchid” or “tomato” — it’s whether the container can keep roots moist but not waterlogged, with enough soil and air.
Once you understand that, you can look at any container and know if it’s a quick win, a fixable project, or a hard no.
How orchid pots are different (and what that means for veggies)
Orchid pots are designed for plants that like air around their roots and very fast drainage. That leads to three key differences from ordinary pots:
- Extra drainage – Multiple or oversized holes in the base, sometimes in the sides.
- Lots of airflow – Slits, gaps, or net-like sides let air and light reach roots.
- Shallower or narrower soil area – They expect chunky bark, not dense potting mix.
For vegetables, this translates to clear pros and cons.
Pros for veggies:
- Great drainage means less risk of root rot.
- Side holes can give extra oxygen to roots.
- Often lightweight and easy to move.
Cons for veggies:
- Soil can dry out very fast, especially in hot, windy spots.
- Side slits can let potting mix leak out.
- Shallow pots may not have enough depth for root crops or big plants.
So you’re not fighting “wrong use of orchid pots”; you’re balancing drainage vs. moisture and volume vs. root needs.
Which veggies actually do well in orchid pots
Not every vegetable is a candidate for orchid pots. To decide quickly, look at two things:
- Root depth the crop needs
- How thirsty it is
Best matches for most orchid pots (especially 8–10 inch and up):
- Leafy greens: lettuce, baby spinach, arugula, Asian greens, chard
- Herbs: basil, parsley, cilantro, chives, thyme, oregano, mint (in its own pot)
- Green onions / spring onions
- Radishes (in pots at least 6–8 inches deep)
- Small Asian cabbages like pak choi (in larger orchid pots)
Okay with bigger, deeper orchid pots (10–12 inch+) if you watch water carefully:
- Bush beans (dwarf varieties)
- Compact peppers (patio or dwarf types)
- Dwarf cherry tomatoes (check the label for “patio”, “balcony”, or “dwarf”)
Poor matches for most orchid pots:
- Large tomatoes (indeterminate types)
- Big peppers and eggplants
- Potatoes
- Carrots, beets, turnips (unless the pot is 10–12 inches deep and wide)
- Squash, cucumbers, melons (these need big root zones and steady moisture)
If all your spare orchid pots are small (4–6 inches across), reserve them for:
- Cut-and-come-again lettuce
- Baby spinach
- Single herb plants
- A tight bunch of green onions
You’ll get the most success by matching small, fast crops to small, fast-draining pots.
The non‑negotiable rule: drainage first
Before you get excited about which veggie goes where, you need to know one thing:
Every edible plant container needs a way for excess water to escape.
No exceptions. If water can’t get out, roots sit in a cold soup of water and low oxygen. That’s how you get yellow leaves, fungus, and mystery plant deaths.
For orchid pots, drainage is usually too much, not too little. But if you’re mixing in other specialty containers (ceramic cachepots, metal buckets, baskets), check for these:
- No hole at all: This is a cachepot or cover pot. The plastic grower pot usually sits inside.
- One tiny hole: Common in decorative ceramic pots.
- Plugged hole: Rubber or plastic stoppers in the base.
Here’s what to do:
- If it has no holes, either:
- Use it only as a cachepot (see the next section), or
- Drill holes (if the material allows — more on that shortly).
- If it has one small hole, you can often still use it, but:
- Use a very light potting mix (never garden soil).
- Add extra drainage material in the bottom (not rocks; more on that too).
- Water slowly and stop as soon as water appears at the hole.
For orchid pots, your problem is rarely drainage. It’s usually that water and soil escape too fast. The rest of this article is about fixing that without suffocating the plants.
Drill, line, or double‑pot? Choosing the right hack
You have three main ways to turn “weird” containers into veggie-friendly homes:
- Drill holes – Best for solid-bottom pots with no or poor drainage.
- Line or block gaps – Best for orchid pots with too many/large holes.
- Double‑pot (pot‑in‑pot) – Best for pretty outer pots with no or questionable drainage.
1. When and how to drill holes
If the container is:
- Plastic
- Thin metal
- Lightweight wood
…it probably wants drainage holes.
How to drill safely:
- Use a cordless drill on a slow setting.
- For plastic and metal, a standard twist drill bit works.
- For ceramic or tile-like material, you need a masonry bit and patience.
- Put the pot on a towel or piece of wood to stop it slipping.
- Mark 3–5 spots in a circle around the bottom; drill slowly until through.
Aim for at least 3 holes in anything wider than 8 inches. The goal is even drainage, not one big plug hole.
When not to drill:
- Expensive or sentimental ceramic pots you’d be sad to crack.
- Very thick or unknown materials (risk of shattering).
- Woven baskets (you don’t need holes; water can escape through the weave).
If you can’t or don’t want to drill, jump to the double‑pot method.
2. When to line or block orchid pot gaps
Orchid pots often have big side slits or bottom holes that:
- Let potting mix wash out
- Dry the soil too quickly
- Let roots be exposed to hot sun
You still want drainage — just not leak-everything-out levels. So your goal is to slow water and soil loss without sealing the container.
Simple lining options:
- Paper coffee filters – Lay one over the bottom before adding soil. It keeps mix from falling through, but water drains. Replace each season.
- A square of shade cloth or mesh – Cut to fit the bottom. Great for reuse.
- A piece of old window screen – Same idea as mesh.
- Jute or coir liner – Especially for side gaps in hanging orchid baskets.
Avoid plastic bags or cling wrap as liners unless you punch multiple holes through them. Otherwise, you’ve created a no-drain pot.
Line the bottom so you can still see holes, but soil doesn’t immediately pour through. For side slits, push a strip of coir, jute, or mesh along the inside wall where the gaps are largest.
3. When to double‑pot (pot‑in‑pot)
Double‑potting is simple:
- A growing pot with drainage sits inside
- A pretty outer pot or basket, which may or may not have holes
This is especially useful when:
- The outer pot has no holes and you can’t drill it.
- You want to catch excess water to protect floors or furniture.
- You want the look of a fancy container without sacrificing drainage.
How to do it for veggies:
- Pick an inner pot with drainage holes that fits comfortably inside the outer pot.
- Fill and plant the inner pot like any normal veggie container.
- Drop it into the outer pot.
- Water until it drains; empty any water that collects in the bottom of the outer pot within 30 minutes.
You can also use this method with orchid pots as the inner pot, especially if they’re lightweight plastic and a bit ugly. Just make sure the outer container doesn’t trap so much water that the inner pot sits in a puddle.
The myth of “rocks for drainage” (and what to do instead)
You’ll hear this hack often: “Just put rocks or broken pots at the bottom for drainage.”
For vegetables, that’s almost always a bad idea.
Here’s why:
- Water doesn’t magically move faster through a rock layer.
- Instead, it builds up in the soil above the rocks, creating a permanently wet zone right where roots live.
- With shallow containers (common in orchid pots), you’ve just shrunk the healthy root zone even more.
What actually works better?
- Use a high-quality potting mix, not garden soil.
- Stick to one consistent medium from top to bottom.
- Adjust soil composition instead of stacking layers.
If you want to:
- Slow drainage slightly (orchid pot dries out too fast):
- Add more organic matter like compost or coconut coir to the mix.
- Use a mix labeled for vegetables or containers, not “cactus” or “succulents.”
- Speed drainage (heavy ceramic pot with few holes):
- Add perlite or coarse material to fluff the mix.
Use mesh, cloth, or coffee filters to keep soil from escaping pot holes — not rocks.
Building the right potting mix for repurposed containers
Repurposed containers work or fail mostly because of what’s inside them. With orchid pots, you’re almost always starting from too much air and drainage. Here’s how to adjust.
For orchid pots (lots of drainage, side holes)
Aim for a mix that holds water a bit better than usual. A simple recipe:
- 3 parts all-purpose potting mix
- 1 part finished compost (bagged is fine)
- 1 part coconut coir or peat moss (for water retention)
Mix this in a tub or bucket before filling your pots.
This gives you:
- Enough structure to hold moisture
- Enough air pockets so roots can breathe
- Enough nutrients to get veggies started (you’ll still need to feed later)
For decorative pots with minimal drainage
Here you want something lighter:
- 3 parts all-purpose potting mix
- 1 part perlite or pumice
- Optional: a small amount of compost if the pot is 8+ inches deep
This loosens the mix so water doesn’t linger as much around roots.
What not to use in containers
- Garden soil / topsoil – Too dense, compacts badly in pots.
- Straight compost – Holds too much water, low structure.
- Straight manure – Can burn roots, too strong.
Think of potting mix as a lightweight, spongey home that roots can explore with ease.
Do‑this‑not‑that: common container hacks made veggie‑safe
Use this simple cheat sheet whenever you’re tempted to improvise.
1. Using a big, pretty orchid pot with side slits
- Do this:
- Line the inside with a thin coir or jute liner.
- Add a coffee filter or mesh over the bottom holes.
- Fill with moisture-retentive veggie mix.
- Plant leafy greens or herbs.
- Not that:
- Filling it with straight orchid bark or garden soil.
- Planting a full-size tomato and wondering why it wilts every afternoon.
2. Turning a decorative ceramic pot (1 small hole) into a veggie pot
- Do this:
- Check the depth: aim for 8+ inches for most veggies.
- Fill with a light, perlite-rich potting mix.
- Water slowly and stop as soon as water drains.
- Not that:
- Filling halfway with rocks "for drainage."
- Using heavy clay garden soil that stays soggy.
3. Reusing a plastic orchid pot with many bottom holes
- Do this:
- Place a square of mesh or coffee filter at the bottom.
- Set it inside a solid outer pot as a cachepot if you want to catch drips.
- Grow herbs or small greens.
- Not that:
- Plugging all the holes with tape or plastic (invites root rot).
4. Using a basket or woven pot cover for veggies
- Do this:
- Use it as an outer cover for a plastic nursery pot.
- Or line it fully with a coco liner that allows drainage.
- Not that:
- Pouring potting mix directly into unlined woven baskets that will rot fast.
5. Repurposing a metal bucket or tin
- Do this:
- Drill 4–6 holes in the base.
- Add a lightweight mix with some perlite.
- Place it somewhere it can drip freely.
- Not that:
- Skipping holes “to protect the floor.” Roots will pay the price.
Whenever you’re in doubt, ask: Where will extra water go? and Can roots get enough air? If you can answer both, the hack is probably safe.
How to water vegetables in fast‑draining orchid pots
Even with the right soil, orchid pots tend to dry faster than regular pots. That’s not a dealbreaker; it just means you water with more intention.
Simple daily check routine
Once your veggies are planted:
- Stick a finger into the soil up to your first knuckle.
- If the top inch feels dry, water.
- If it’s still cool and slightly damp, wait and check again tomorrow.
In hot weather, this may mean watering once a day, especially for small pots in full sun. In cooler or rainy weather, every 2–3 days might be enough.
Watering technique for repurposed containers
- Water slowly, aiming at the soil, not the leaves.
- Keep going until water runs from the bottom holes.
- For double‑potted setups, empty any collected water within 30 minutes.
If you find the soil dries out completely (pulls away from the sides), try:
- Adding a thin decorative mulch layer (compost, straw, or even clean dry leaves) on top.
- Moving the pot to a spot with morning sun and afternoon shade, especially for lettuces and herbs.
Simple fertilizer plan for container veggies
Because containers (especially orchid pots) drain fast, nutrients wash out faster than in garden beds. Feeding doesn’t have to be complicated, though.
A starter plan that works for most veggies:
- Mix a slow‑release organic fertilizer into the potting mix at planting time, following the package rate.
- Every 2–3 weeks, use a water‑soluble fertilizer at half strength as a “tea” when you water.
For leafy greens and herbs in smaller orchid pots, this gentle, regular feeding keeps them growing without overwhelming the roots.
Watch your plants:
- Pale leaves and slow growth often mean they’re hungry.
- Very dark green, lush growth with few flowers (on peppers/tomatoes) can mean too much nitrogen; back off a bit.
A quick container check before you plant anything
Before you move a single seedling or seed into a repurposed pot, run through this mini-inspection:
- Size:
- At least 6 inches deep for radishes and small herbs.
- 8 inches or more for lettuces, chard, bush beans.
- 10–12 inches for compact peppers and dwarf tomatoes.
- Drainage:
- Can extra water escape somewhere?
- Is it too much (orchid pot slits) or too little (one pinhole)? Adjust with lining, mix, or drilling.
- Material:
- Metal in full sun heats up; consider moving to partial shade or double‑potting inside a ceramic or plastic outer pot.
- Dark plastic can also get hot; light-colored outer pots help.
- Stability:
- Narrow-bottom pots with top-heavy plants can tip. Use them for low, leafy crops instead.
If a container passes those four checks, it’s likely safe for vegetables with the right soil and watering.
Turning “leftover pots” into a real mini‑garden
Once you see orchid pots and other odd containers as raw material, not junk, your options open fast.
You might:
- Turn three mis‑matched orchid pots into a salad trio: one with cut-and-come-again lettuce, one with arugula, one with baby spinach.
- Use deeper, sturdier decorative pots for bush beans or compact peppers.
- Line a wide, shallow orchid bowl and grow a carpet of chives and parsley on your kitchen balcony.
Tie this back to what you’ve learned in earlier steps of your veggie‑growing journey:
- From your small‑space layout (like you’d map in a tiny deck garden), you know where the sun is best.
- From your first plant shopping trips, you know which crops you actually cook with.
- Now you’re simply giving those plants homes that balance drainage, volume, and convenience, without buying a single new pot.
You don’t need a matching set of expensive containers to grow food at home. You need a clear eye for drainage, a decent potting mix, and the confidence to say, “Yes, this orchid pot can totally grow tonight’s salad.”
Once you’ve tried a few of these hacks, you’ll start seeing potential veggie containers everywhere — and that’s when your at‑home harvest really starts to grow.